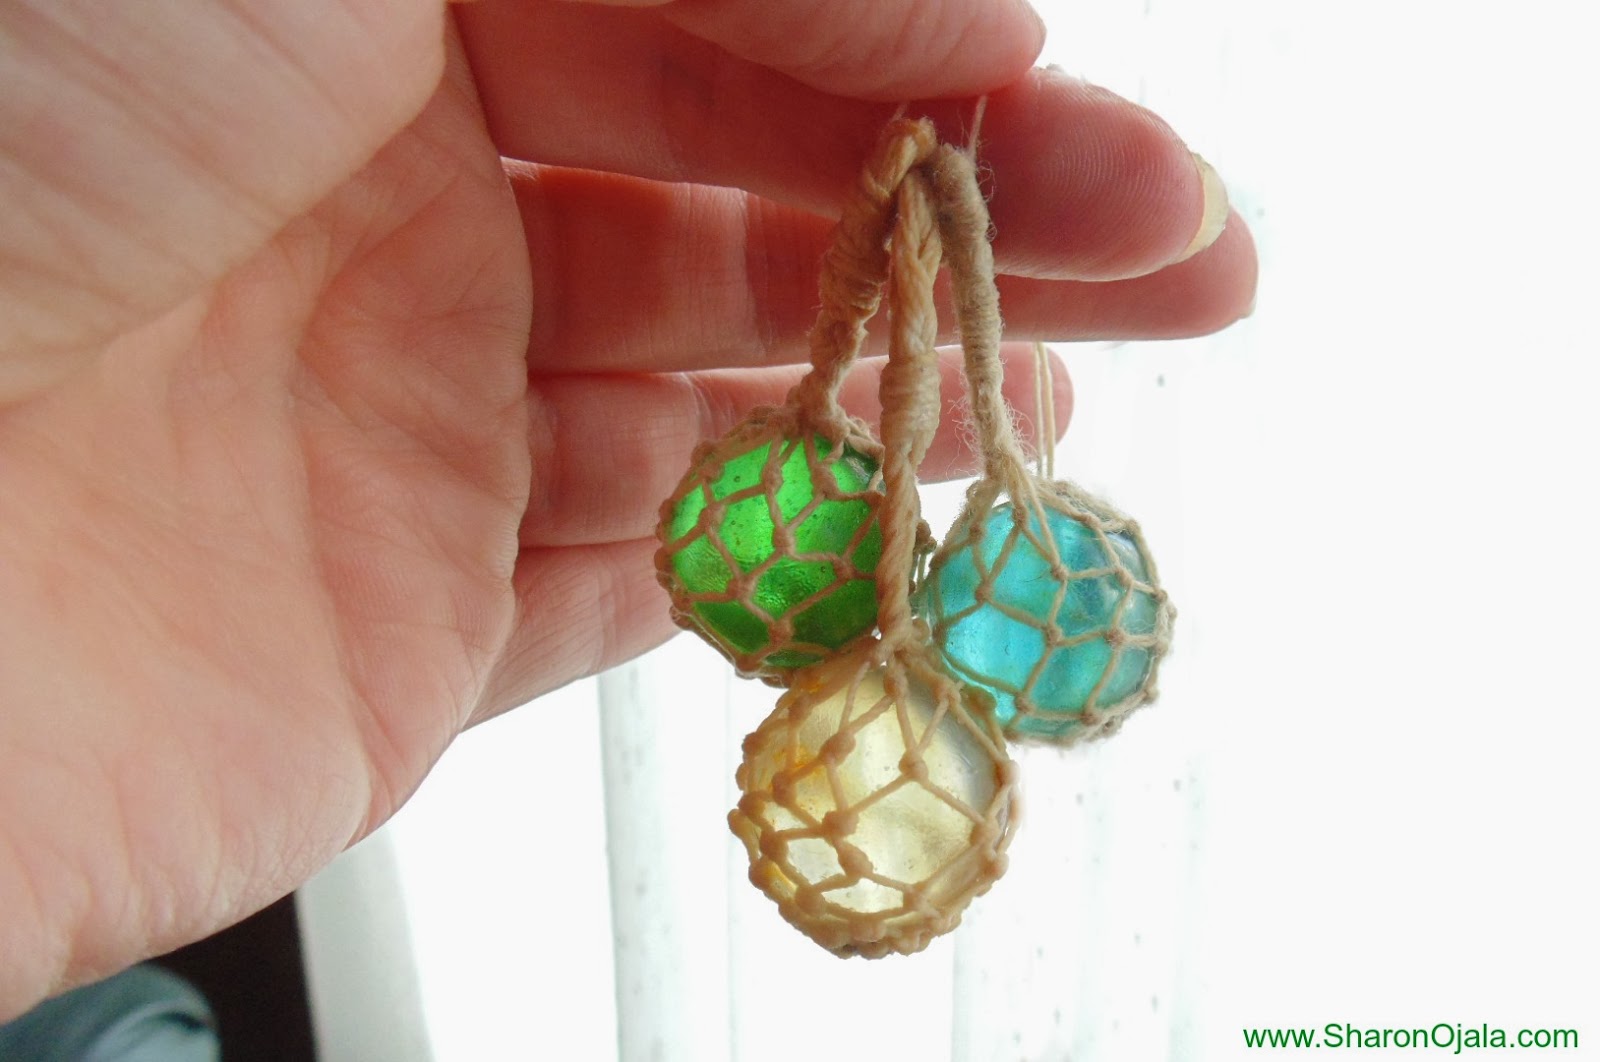
How to make a miniature boat float photo and video tutorial.
Supplies needed:
marbles, large or small
crochet thread #10
sewing needle with eye big enough for crochet thread
fabric-tac or tacky glue
pencil or pen
20 gauge wire
wire cutters
scissors
Optional but very helpful:
I found it super helpful to have a stand like the one pictured below to help me. I made one with an extra large plastic knitting needle and a wooden block. Drill or carve a hole in the block just big enough for the needle, you want it to fit snug. Glue the needle or wooden dowel in and let the glue fully dry. It was like having a 2nd pair of hands!
Make a small ring from the wire by wrapping a length around a pencil or pen. Cut the ends free, then cut the overlap. Make sure the ends are touching.
With a length of crochet thread and your needle wrap the ring completely. Use the fabric-tac to help secure the thread as you wrap. Cut the ends free when done and add a bit more fabric-tac to secure the ends to the wire.
Step two:
cut 8 lengths of crochet thread, each 2ft long. Fold one string in half. Push the folded end through the center of the ring. Pull the 2 loose ends through the loop and pull tight. Do this for all 8 strings.
Step three:
You now have 8 sets of strings. Knot off 2 strings, using 1 string from each set. See photo, knot string 1 with string 2 and repeat around the ring. Carry your knots right up to the ring leaving very little space between the ring and the knot. You will have 8 knots when done.
Step four:
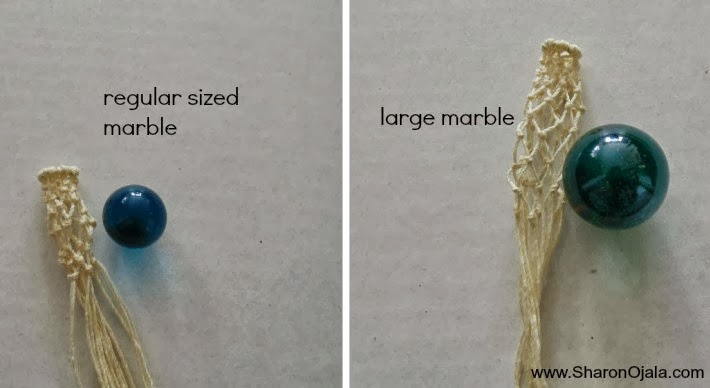
Repeat the knotting process around again, this time the knot you put in will be carried up and placed under 2 knots. Take your time, try and get these knots in the middle and as close as you can get them to the 2 knots above them. Repeat this for the remaining rows. The number of rows you repeat will depend on the size of marble you are using. A small regular sized marble with need a net with about 4 or 5 rows . A larger marble will need a net with about 8 or 9 rows.
Step five:
Now you can put the marble inside the net. You will have to push the marble inside and at the same time pull the net over and downwards to make it fit. Once you have the net completely over the marble decide how you want to finish off the ends. You can twist them and make a short loop or braid the ends as I did, bending the the end of the braid over then wrapping a few strings around it to secure the loop. Use fabric-tac to secure the strings.
You can stain the net to make it look old and well used. In the photo below I went a bit too dark by using black coffee. I think maybe tea might be a bit better next time.
If you want a boat float that looks weathered then stain it. Dip the float in the coffee, make sure the entire float gets dipped. Dab the excess with paper towel then let dry.
Step seven:
Enjoy your miniature glass boat float!


These are great! I have a friend who collects the real ones and I bet she'll love your tutorial. Thanks
ReplyDeleteQuedan muy bonitos.
ReplyDeleteWhat a wonderful idea!!! Now I have to find some marbles...
ReplyDeleteThanks for the tutorial.
ReplyDeleteprecioso el tutorial!
ReplyDelete