
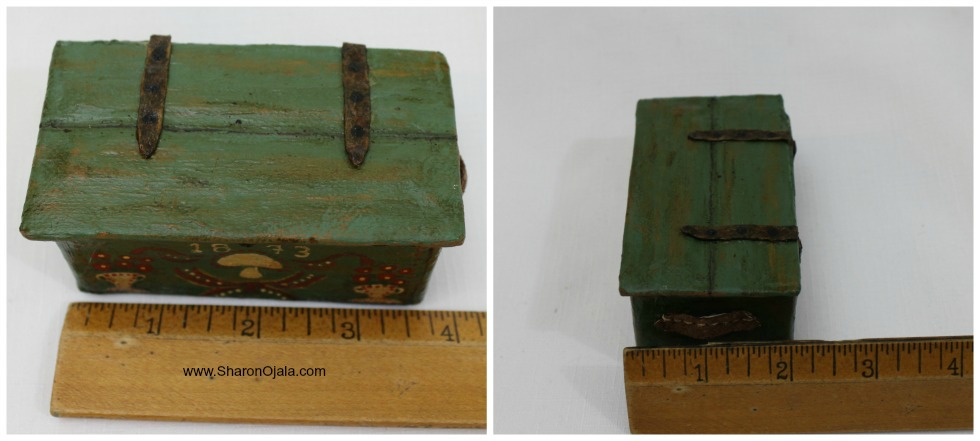
Miniature trunk for the Gnomes,
It looks and feels like an old wooden trunk that has been passed down in the family but it's actually made from foil and masking tape.
I've done my best to explain how I made it along with photos below. I hope you enjoy!
If you ever make yourself one of these, I would love to see it. Post pictures on my facebook page or tag me on instagram.
The How:
1) I don't use a ruler or anything when I make miniatures, most everything is custom fit to the project I'm working on at that time. I made this trunk to sit at the foot of Aunt Katri's bed. I used tinfoil and masking tape for the base of everything. The first piece of foil I laid at the foot of the bed and made the width of the trunk a little less than the length between the 2 leg posts, taking into consideration the lid of the trunk would be slightly wider. Again, the height of the trunk sides was decided the same way.
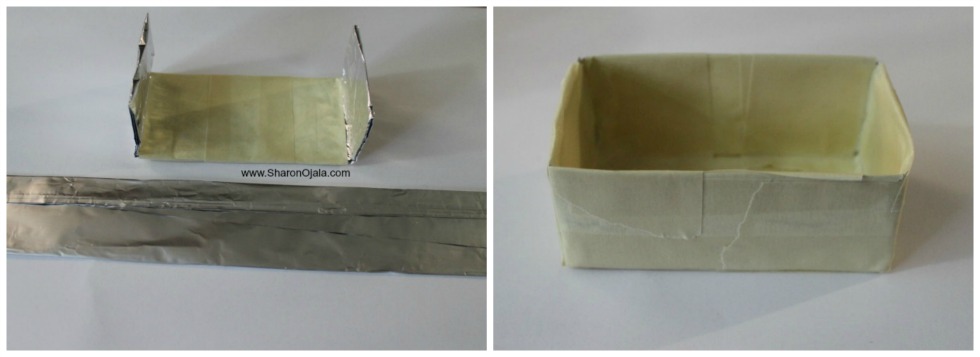
2) After I taped the tinfoil, I taped it again. Then for stability and to also make sure the trunk maintained its shape I added a length of wood along the very top edge of the trunk. The pieces of wood were cut to fit exactly, having to force the side pieces in place. The fit was so snug they held themselves up before I even taped them in place. I also added 2 lengths of wood along the middle of the lid. I also taped those pieces in place. The wood I used was coffee stir sticks. They cut easily with scissors and I use them a lot in my miniature projects.

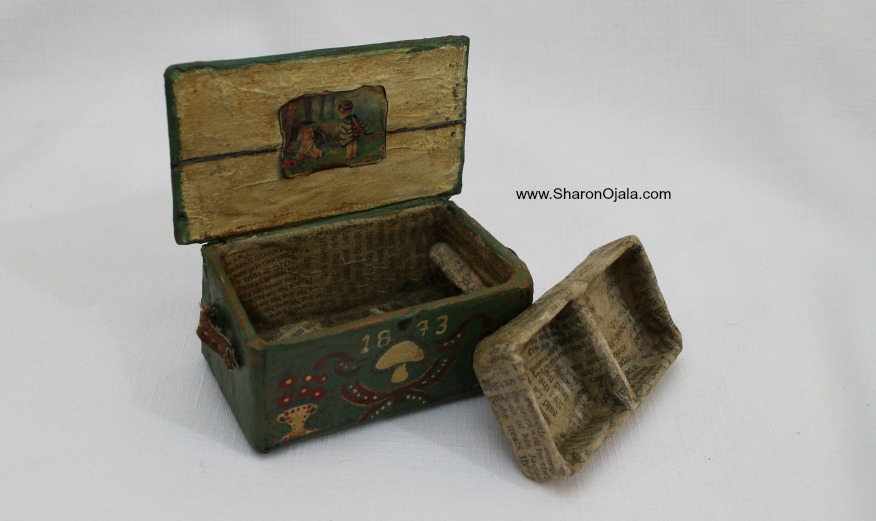
3) I didn't have any hinges on hand for the lid so I settled on masking tape. This works surprisingly well! You just have to hold the pieces slightly, (ever so slightly), apart then tape together. This little space between them will help them open and close smoothly. I taped the entire width on top and then the inside. This way the sticky sides of the tape actually touch in that slight space. After the lid was on, I opened and closed it a few or more times to make sure it was straight and opened/closed without any issues.
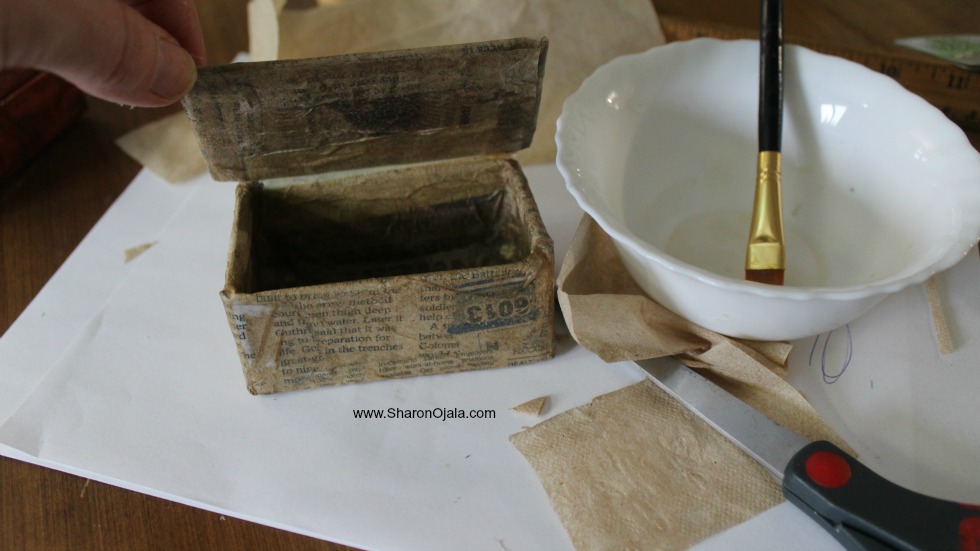
4) I then covered the entire surface with strips of newspaper dipped in glue. Once it was fully dry I added a layer of tissue paper. This isn't necessary but I wanted to add it for its color I used a napkin from McDonalds. It's super thin, almost sheer when fully opened up. I brushed on glue mixed with water then laid the tissue over it then brushed that with glue.
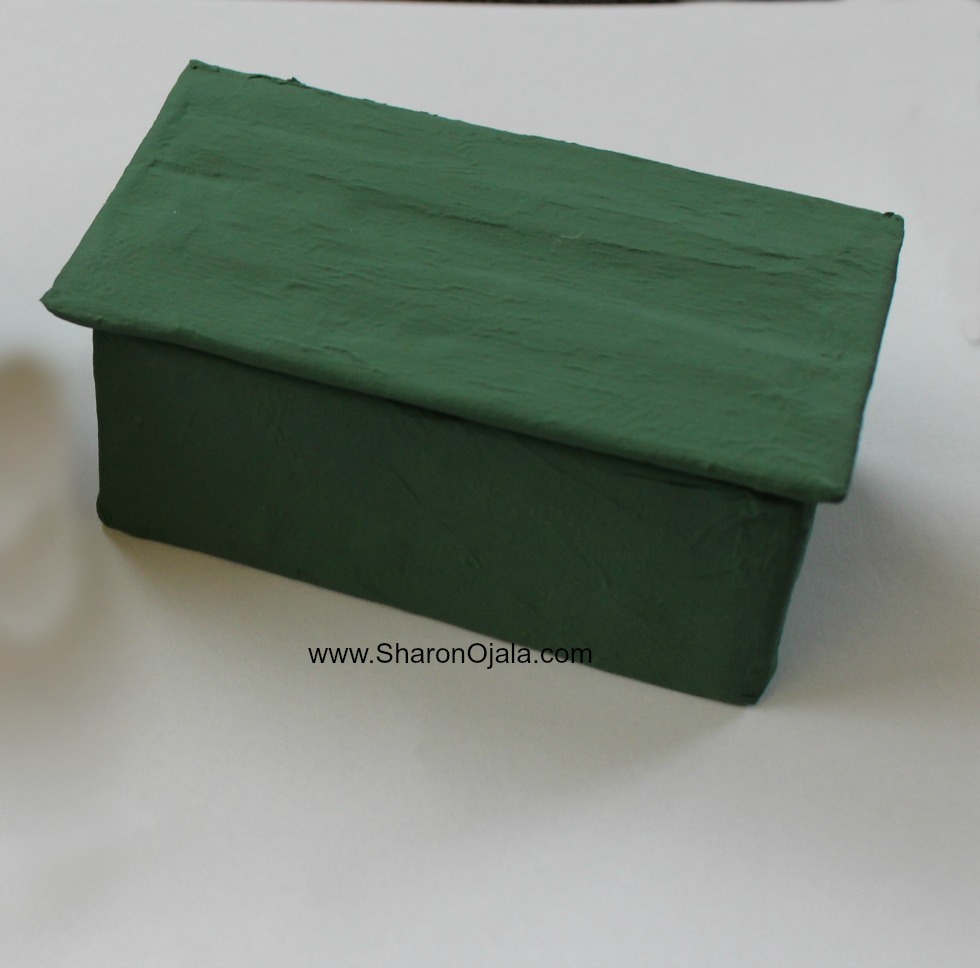
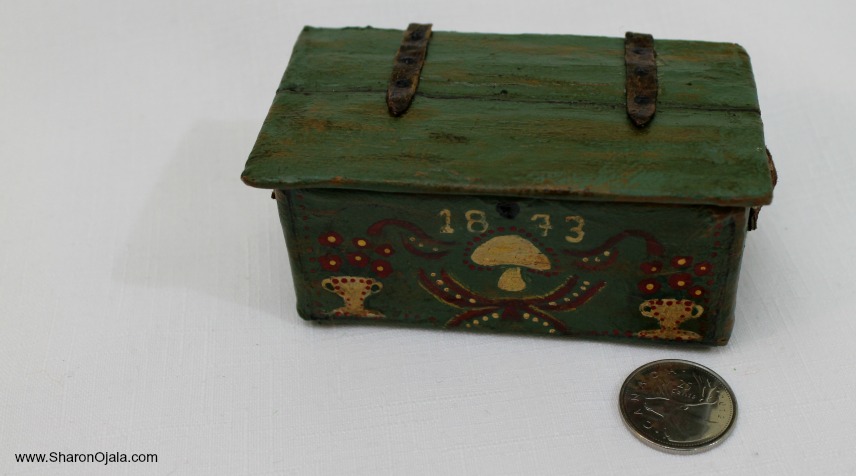
5) I mixed different colors together to get the shade of green I wanted. Hunter green, cream and just a tad bit of brown. This color will change slightly after I apply my stain.
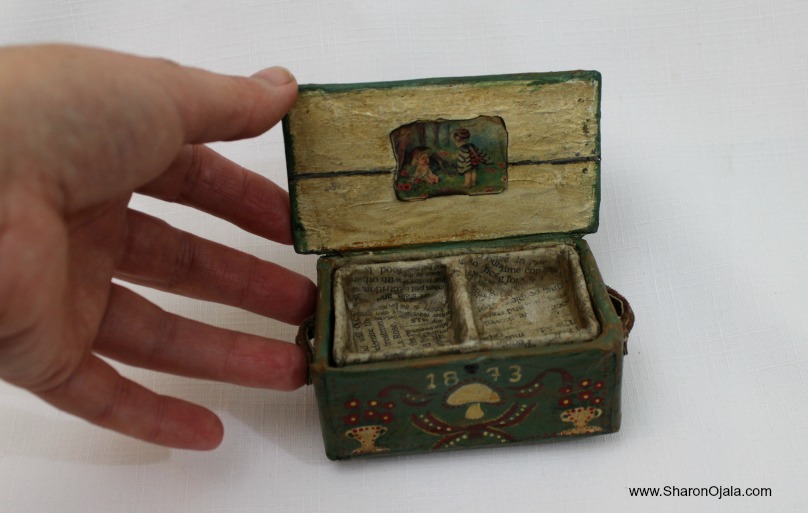
6) Before I added my stain I painted on the decorations and also the inside of the lid got painted with cream. The painting of decorations made me feel as though I was 10 years old and never painted before, lol I was completely at loss as what to do. I think that was due to painting at 3am in the morning. My brain went blank so I just decided to scribble a bit and add a mushroom. I think it turned out okay. Looking at old folk art trunks online, many of those those drawings are similar in fashion to mine. The less than perfect drawings adds to the charm I think. I also added the year that my Great Grandfather was born.
7) The lithograph on the inside of the lid is just an image I got from google search, printed off in wallet size. I roughed up the edges a bit and glued it in place.

8) The tray was made the same way as the trunk but there is no wood at all in this piece. It is tinfoil covered in masking tape, layered in newspaper dipped in glue then covered in tissue. It feels just like wood!

9) Before adding the faux hinges I rubbed some wood color paint around the edges and along the lid to make it look worn in those places.
10) The faux hinges look like 2 pieces but I made them from 4 separate pieces. Tinfoil, masking tape then painted them black. I wanted a rusty look so I glued a piece of tissue paper over them, (McDonalds napkin) once that was dry I brushed over dark coffee stain (explained in the next paragraph). Once they were dry I dotted in nail heads with black paint and then sprayed a sealer over the hinges. I left a little space between the top and bottom hinge because if I wrapped the hinge around it would cause the lid to not open and close properly. I used a toothpick and squeezed pieces of tissue soaked in coffee and glue in between the top and bottom hinge to make them look like they were connected.

11) After the painting was done, the lithograph in place and hinges glued on, I brushed the entire trunk surface and the inside lid with instant coffee. I love using this as a stain as it adds the perfect shade of vintage! You can make the instant coffee stain as light or as dark as you want. The only thing you have to keep in mind if you use this stain is you must spray a sealer over it once it's dry OR it'll be sticky and will just rub off in no time. It has to be a spray sealer and not the brush on kind. I use a matte, acrylic sealer.
12) The handles are 2 short pieces cut from an old leather jacket I use for crafts. I cut on each side of a seam so it gave the look like they have been sewn just like on a real trunk. I glued them in place.
13) I added legs/feet to the bottom of the trunk, I glued lengths of thin wood, one on each side to raise it up just a little bit.
I am totally in love with this trunk! Although it's made almost entirely of foil and paper it feels just like a real wooden trunk. I can't wait to fill it up with miniature keepsakes.
I hope you enjoyed this post and maybe got some ideas for making your own vintage trunk. Thanks so much for stopping by, see you soon!
Es un estupendo trabajo.
ReplyDeleteIt does look like wood. Fantastic work. Thanks for sharing.
ReplyDelete