For the Kitchen,
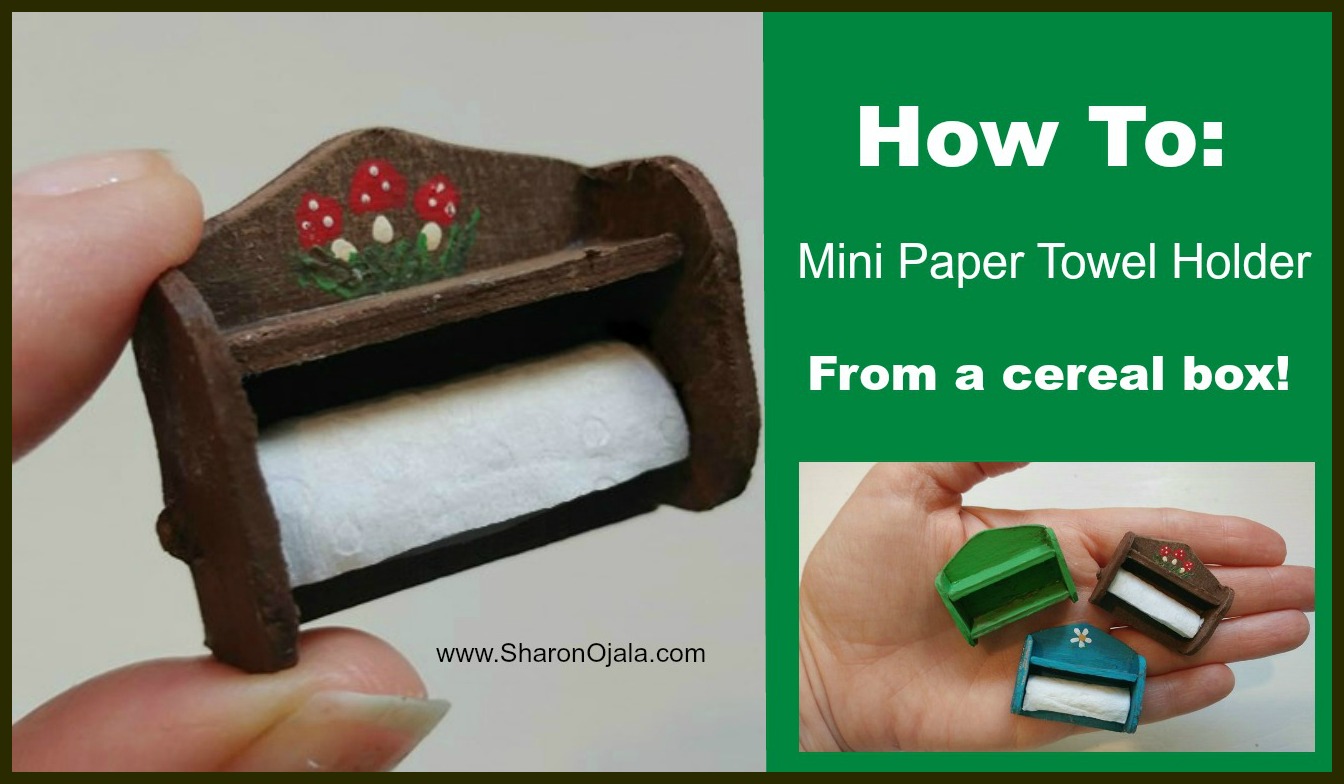
Hello everyone, let's make a paper towel holder for a mini kitchen. We don't need any wood, just a cereal box and some tacky glue. I gave the measurements below, you can adjust these to any size of paper towel holder you would like to make. The measurements given are suitable for the 1:12 scale.
These little holders are sturdy and fun to make. Let's get started!
Supplies:
cereal or cracker box
tacky glue
x-acto knife
scissors
ruler
brayer, rolling pin or jar
acrylic craft paint
paint brushes
paper towel or napkin
Optional - tooth pick
If you chose to use a toothpick then you will also need an awl or pointy object to poke holes.
Optional but very helpful - cutting mat
Step one: Prepare the cereal box
Cut out one side of the box free and cut off the ends.Then cut that into 3 even pieces. Glue all 3 pieces together. Make sure the glue is spread over the entire surface of the cardboard. Glue the pieces together so that you have plain board on both sides. Roll over it with a brayer to assure there's full contact between all 3 pieces. Tape the ends to keep the pieces from slipping then place under a heavy book for about 30 minutes.

Step two: Cut straight edges
Using an x-acto knife cut straight edges all around the piece using the lines on your cutting mat as a guide and a ruler.
1 Back piece: 3cm x 3.5cm
2 Side pieces: 1.5cm x 3cm
1 Shelf: 1cm x 3.5cm
Shape the top of the back piece.
I did this by marking a dot in the center then a dot on either side, draw a line from the center dot to the 2 side dots and then cut on the line with scissors. You can also sand this part when you're done cutting.

You can glue the shelf on 2 different ways,
One way is edge to edge of the back piece and have the side pieces glued under it, like they are holding the shelf up.
If you do this then you will have to cut off some length of the side pieces. Length of the side pieces then will depend on where you put the shelf, cut them accordingly.
The 2nd way is to cut some length off the shelf so it fits on the inside the side pieces. If you want it to sit inside the side pieces then hold 2 side pieces together and place them on the end of the shelf, mark a line of their combined thickness, and that is how much length you need to cut off the shelf.

Cut and shape the side pieces,
Round the top and bottom corner of the side pieces. If you are gluing them on the outside of the shelf then cut them the same length as the length from the top and bottom corners of the back piece.

In the video tutorial I show how to add in a tooth pick and have that going through both side pieces. The paper towel is rolled over the stick and it can spin after everything is glued together.
It's really not necessary to do this step, it's more work for a small detail that probably won't be used, lol. If you want to see how I do that then please watch the video.
Paint all the pieces then assemble,
Paint all the pieces. Be sure to paint all side and edges.If you want to add a bit of decoration, do that before assembly.
Once the paint is dry glue the 2 side pieces on then the shelf. Roll up a strip of paper towel and glue it in under the shelf leaving a bit of space between the shelf and paper. Set aside and let the glue fully dry before attaching it to the wall.

Comments
Post a Comment