
Where the Gnomes Live,
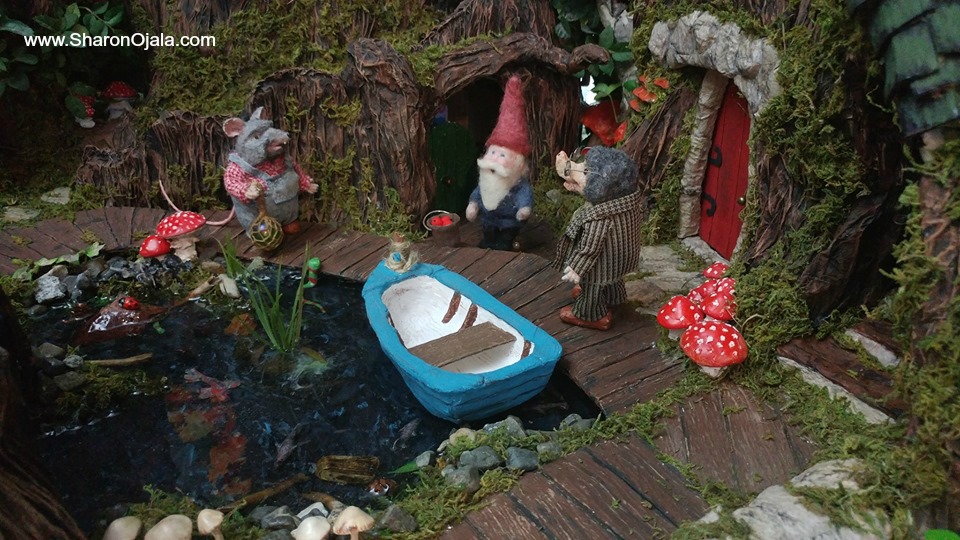
Before I get to the updates I wanted to say, when I named my youtube channel, Where The Gnomes Live, this is kind of what I was thinking of, although, at the time I really didn't know it was going to look as awesome as this! The addition of the pond has added a lot of life to the exterior of this B&B.
I wanted the Gnomes and all their friends to have a natural looking background that looks much like you would see in the forest with trees, moss, and water. With those elements it really does look like a place that all these creatures would call home.
Updates,
I removed the one tree that had the bridge and added a big pond instead. I added a small hollow stump to replace the tree. It's given me so much more room! The inside of the hollow stump has now become part of the pond, I'll be showing more of that part at a later date.
For those who saw and loved the bridge, don't worry, it'll be used on the other side of the forest instead.
I extended the wooden walkway and it now goes all the way around and meets where it starts. I didn't show the one end, along with part of the hollow stump, as I'm still working in that area.
Outside of the pond I also extended out the front of the one tree (with the red door). I added the red door, some stone work, windows, the stairway, shingles, and a chimney. It'll be part of the Bed & Breakfast and be a room to rent. A room with a view of the pond. Lucky guests!

The pond basin,
It would have been so easy to use a plastic container as a basin but I needed a pond that would go with the shape of the grounds so I used foil instead.
I molded foil into a basin that fits all the way around and just under the walkway. I pushed the edges of the sides back a bit so that the water looks like it flowing under the walkway.
The sides of the basin are about 1.5 inches high. Then I covered the foil in masking tape. I covered that with paper towel dipped in glue and let dry. It's the same process I use for fake bark.
Please keep in mind I am no expert here, this is only the 2nd time I've made a water scene.
I painted the entire surface with black acrylic and let dry again. I sealed it all in with a water based sealer. I figured this would keep the resin from seeping through the paper towel.
I used a lot of hot glue on the bottom to make different areas higher then other areas and add interest. I added some rocks around the edges. Some of the rocks are piled as high as the sides, some aren't. I wanted an uneven look.
I used black paint over the hot glue, sometimes over rocks too, anywhere where I wanted it to look deeper.
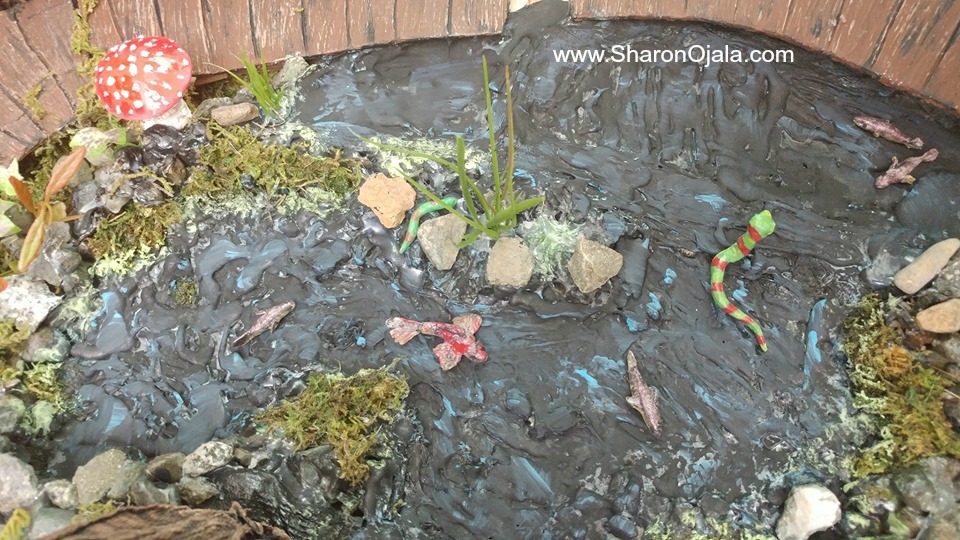
I also used some blue paint randomly around here and there. Once the resin is poured over it looks like the color of real water.
I extended the pond to go inside the hollow stump. For this area I made another foil basin and connected the 2 basins, pushed the edges of the connection down so resin could flow through.
I poured hot glue all over and around the connection to seal it in.
Inside the stump the basin was worked into the walls with tape then paper towel so that the interior walls and the basin became one piece.

The plant life,
For all the plants I used hot glue to attach them.
The moss is the same stuff I've been using on the grounds. I buy it in bags from the dollar store.
I tried moss in my first attempt at a water scene and it became a black gooey mess once the resin was poured over it. This time around I painted over the moss with a water based sealer and that worked like a charm! The moss became stiff, kept it's shape and color, and the resin didn't melt it.
I also used some paint, mixed some colors together like blue, green, and a bit of yellow and painted just in front of the mossy areas to add a bit of interest and color.
The taller grasses are plastic, cut from thrift store finds.
The water,
For the water I used Art Resin. I got it on Amazon and its super expensive but it's easy to mix and pour. It has to be poured in thinner layers so it'll set properly. I have 3 layers in already and just ordered more so I can do the last layer.
Layering is great because you can put fish and other creatures in at different times making them look like they are at different heights in the water.
This photo was taken after the 2nd layer. The snake's bottom half is under water and his top half is coming out of the water onto the walkway.

The creatures,
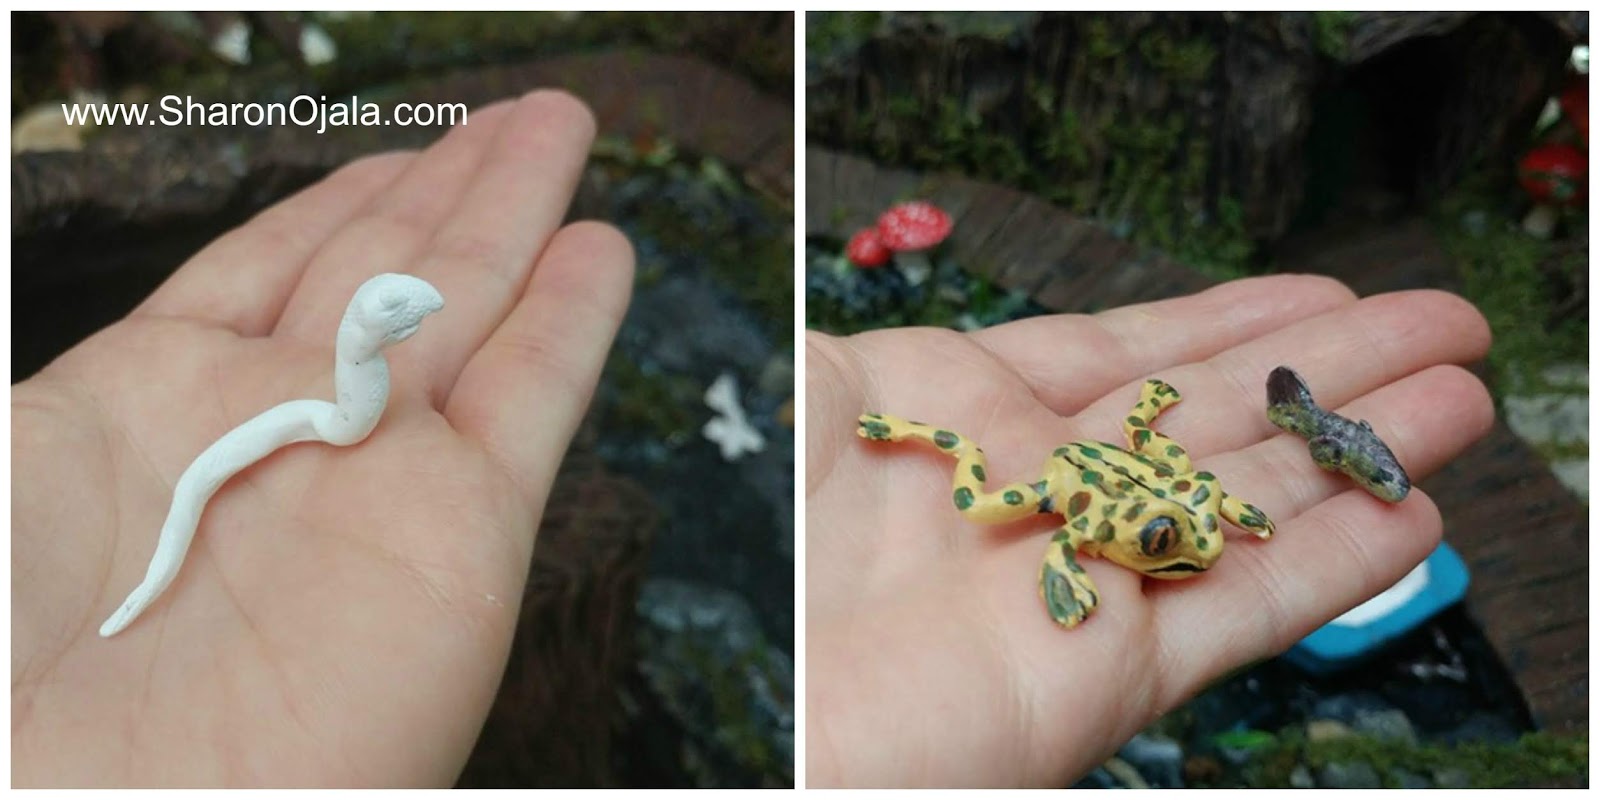
I have fish, tadpoles, snakes, and a swimming frog all at different layers. I do have more little pond creatures in the works right now.
I make them with polymer clay then paint them with acrylic craft paint. I sealed before putting them in resin, with a water based sealer.
The wooden row boat,
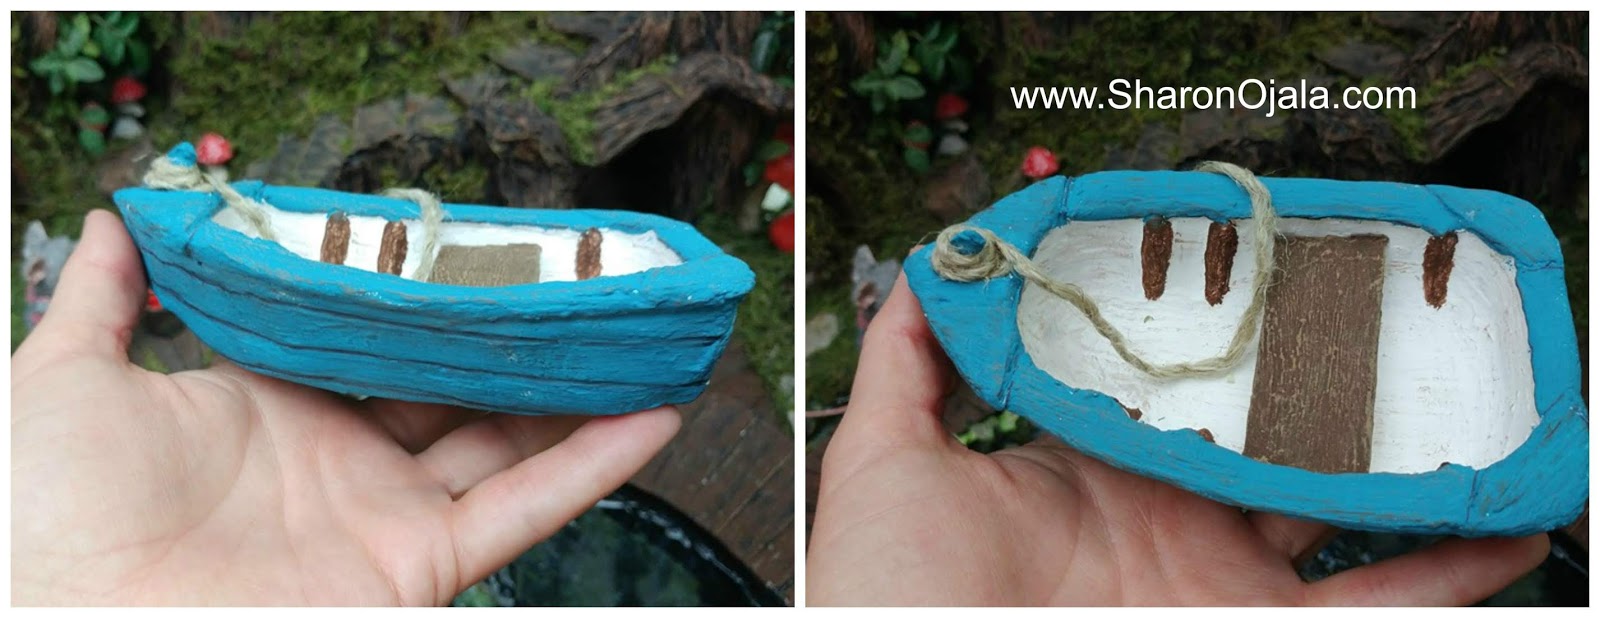
I made the boat using foil, tape, and paper towel. Yes, I do use that same process for so many things!
Doing it this way I'm able to get the exact size and shape I need. It's a building method that has worked for me time and time again.
Over the base of the boat I added wood filler. I did this part in layers, drying each layer in between. I have no idea how many layers I did, I just kept working at it over a course of a couple days, in between other projects.
I smoothed out the wood filler by running a wet finger over it than I added texture before it dried by pulling a bottle brush over the surface.
A pet brush, a comb, toothbrush, anything with bristles will work
Wood filler is not the strongest over an open area that's been built with foil so that wooden seat I added does 2 jobs. It's a seat, of course, but it's also a stabilizer for the sides, keeping the sides from ever being squeezed together. Overall, it's a very sturdy little boat.
Yes, I'll be making some paddles for it asap... a row boat doesn't get very far without paddles!
I think that will cover the latest updates for now. I have so much more to do in this backyard area so come back soon for that or watch for updates on my facebook page.
Remember, I switched to a new fb page this year called, Where The Gnomes Live, so you have to come over to the new page to get those updates!
Alright my friends, back to work I go. Here's a little video giving you a sneak peek of these updates from my instagram. I hope you enjoy and have a great weekend!
Exquisite Sharon! It's just lovely! It's definitely a place that I would love to visit!! 💕💕
ReplyDeleteHi :) I recently discovered you Gnome world and I am fascinated! I have binge watched all your videos and read all your posts over the last week and am so inspired to have a go at attempting something for myself. Will newspaper work instead of foil do you think? In South Africa foil is very expensive, even the thin one so it's not an option for me.
ReplyDeleteYears ago when I first started out building miniatures I filled a space for a wall with newspaper then closed it in with cardboard then clay. A couple days later I changed my mind on the design and ripped that out, the newspaper felt damp to me. If I hadn't taken that apart then mold would have set in for sure.
DeleteThe climate where I live is very humid so it's a factor to consider. I never suggest using newspaper but I do know some people do build with it and don't have any issues. Results could vary in different environments. I don't want to give you advice that could ruin your project, at the same time, I don't want to say not to use it. I wish I had a better answer for you, sorry!